When you’re preparing for a hike, one of the most crucial pieces of gear to get right is your backpack. A poorly fitted pack can cause a lot of discomfort, including sore shoulders and aching hips, which will quickly ruin any adventure. Fortunately, learning how to size and adjust your backpack properly can make all the difference. Here’s a straightforward guide to help you avoid common packing pitfalls and ensure your gear is perfectly suited to your body.
Why Backpack Fit Matters
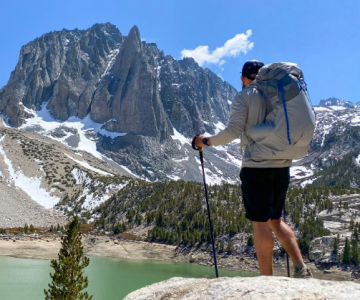
If you’re looking forward to a long hike in a beautiful, secluded wilderness area, the last thing you want is to be slowed down by back or shoulder pain after just a few miles. While selecting the right footwear is important, a well-fitting backpack is just as crucial for a comfortable experience. To ensure a smooth journey, you need to make sure your backpack is sized correctly and adjusted properly. This article will walk you through the necessary steps to get both right. If you’re not sure which pack to choose in the first place, be sure to check out my other gear guides for advice on that too.
How to Choose the Right Size Backpack
Choosing the right size for your pack isn’t just about picking a volume that fits all your gear. It’s about ensuring the pack’s suspension system and waist belt are properly suited to your body. Although manufacturers provide specific measurements, there are some elements of fit—like the waist belt shape—that can’t be measured by numbers alone. It’s best to visit a store and try the pack on to see how it feels.
Getting Your Torso Length Right
The key to a well-fitting backpack starts with your torso length. This measurement ensures that the pack sits properly on your back, helping distribute the load efficiently. Keep in mind that torso length isn’t the same as your height. A taller person might have a shorter torso, and a smaller person could have a longer torso. To measure your torso length, first locate the C7 vertebra, the bone at the top of your spine, by tilting your head forward. Then, find your iliac crest, which is the highest point of your hips. Have someone measure the distance from the C7 vertebra to the point where your iliac crest lies across your back. This gives you your torso length, which will help you find a pack with the correct suspension system.
Finding the Right Fit for the Waist Belt
The hip belt is another crucial piece of the fit puzzle, as it carries much of the pack’s weight. In fact, up to 80% of the load should be supported by your hips. To achieve this, your waist belt needs to fit snugly around your hips and cover the hip bones for a secure fit. While most people can find a belt that fits them well, those with narrower waists might find it challenging to get a tight fit with standard hip belts. In such cases, consider packs that offer interchangeable waist belts or opt for a smaller pack.
Adjusting Your Pack for Comfort
Once you have the right size pack, the next step is to make it as comfortable as possible. To do this, you’ll need to adjust several elements, including the hip belt, shoulder straps, sternum strap, and load lifter straps. It’s best to make these adjustments with the pack loaded so that you can get a realistic feel for how it will behave on the trail.
Step 1: Tighten the Hip Belt
Start by adjusting the hip belt. It should sit across the widest part of your hips, known as the hip shelf. Tighten the straps so the belt fits snugly around your hips. If your pack is heavy, you might find it helpful to balance the pack on a surface and bend your knees to bring your hips to the right level. This allows for a better fit before tightening.
Step 2: Adjust the Shoulder Straps
Next, focus on the shoulder straps. Begin by loosening them a bit. Then, pull down on the straps to make them fit snugly against your shoulders. The straps should lie flat without any gaps between your shoulders and the pack. Remember, the weight should mainly rest on your hips, not your shoulders, so don’t tighten them too much.
Step 3: Tighten the Sternum Strap
Once the shoulder straps are adjusted, move on to the sternum strap. This strap helps secure the shoulder straps in place and should be adjusted so that it sits just above your chest. It shouldn’t be too tight, as you still need room to breathe comfortably. The sternum strap should help prevent the shoulder straps from sliding off your shoulders.
Step 4: Adjust the Load Lifter Straps
Finally, adjust the load lifter straps. These straps help shift the pack’s weight slightly forward, improving comfort and balance. Start by loosening them, then tighten until you feel some pressure on your shoulders. Be cautious not to tighten them too much, as this can cause the top of the pack to pull away from your body.
Testing the Fit
Once you’ve made all the necessary adjustments, take the pack for a test walk. Lean forward, walk around, and see how it feels. Make sure the pack remains balanced and comfortable. If anything feels off, adjust the straps again, and make sure the weight is distributed properly inside the pack.
Ready to Hit the Trail?
Now that you know how to size and fit your backpack, it’s time to hit the trail! Of course, there are still other considerations when gearing up for a backpacking trip, like choosing the right sleeping bag, stove, and packing technique. But with your backpack fitting properly, you’re already on the right track. Be sure to check out other articles on backpacking gear and tips to ensure your adventure is as enjoyable as possible.
Happy trails!