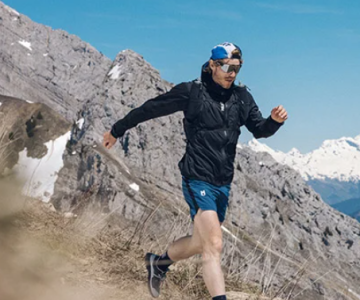
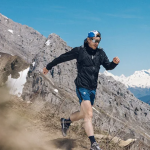
Blisters are a common annoyance for anyone who enjoys outdoor activities like hiking, running, or biking. These painful skin irritations can quickly derail your fun, but with the right prevention and treatment strategies, you can keep them from becoming a major setback. Here’s how you can handle blisters effectively.
What Causes Blisters?
Blisters are typically caused by friction. When your skin rubs against your shoes or socks repeatedly, the body produces fluid beneath the skin, forming a blister. While friction is the primary culprit, other factors like moisture, swelling, and foot abnormalities can worsen the situation. Moisture softens the skin, which increases the likelihood of blisters, especially during long runs or hikes.
The Role of Friction, Moisture, and Swelling
During intense activity, like running a marathon or hiking for long distances, your feet can swell by up to half a shoe size. This tightens the fit of your footwear, creating new hotspots or aggravating existing ones. Added to that, sweat softens the skin, making it more prone to damage from rubbing. This is why blisters are more common in marathons, where the intensity and duration of the effort cause significant perspiration and foot swelling.
Blood Blisters: What You Need to Know
When the friction becomes severe, tiny blood vessels in your feet can rupture, leading to blood blisters. These are often more painful and require careful attention. Blood blisters typically form in areas of your feet where bones stick out, like the toes or the ball of the foot. If one of these blisters forms, extra caution is necessary to avoid infection and promote healing.
Prevention: How to Stop Blisters Before They Start
Preventing blisters is far easier than treating them. The following strategies can help you avoid the discomfort of blisters on your adventures.
1. Change Socks Regularly
Moisture is one of the main contributors to blisters. Marathon runners often carry an extra pair of socks to swap into when their current ones become damp. Dry feet are far less likely to develop blisters, so always have a clean, dry pair ready, especially on long or rainy hikes.
2. Double Up Your Socks
For long hikes or if you’re carrying a heavy pack, consider wearing two pairs of socks. The inner pair should be thin and moisture-wicking, while the outer pair should offer additional padding. This double-layer approach reduces friction and helps keep your feet dry.
3. Invest in Good Quality Socks
While high-quality socks might cost more, they are essential for blister prevention. Look for synthetic socks that wick moisture away from the skin and provide extra cushioning. Choose socks that fit snugly, as socks that are too loose can bunch up and cause friction.
4. Break In New Shoes Gradually
Even if your new shoes are the same size as your old ones, they can cause blisters if they’re not properly broken in. Start with short hikes or runs to allow your feet to adjust to the new shoes. This will give your shoes time to mold to your feet and reduce the risk of blisters.
5. Use Powder or Antiperspirant
To help reduce moisture, apply powder (cornstarch, baby powder, or talcum powder) inside your shoes and socks. Powder can absorb sweat and help keep your feet dry. You might also use an antiperspirant on your feet to prevent excessive sweating during long outings.
6. Keep Calluses Intact
Calluses act as natural protection for your feet, so avoid removing them unless absolutely necessary. However, to prevent them from becoming too hard and cracked, moisturize your feet regularly. A good foot cream will help keep calluses soft and prevent discomfort.
7. Protect Hotspots Early On
If you feel a hot spot developing, take action before it turns into a full-blown blister. Applying blister pads like Moleskin or Compeed can help cushion the area and prevent further rubbing. Ensure the patches are large enough to cover the area entirely, and round off the edges to prevent them from peeling off.
8. Use Lubricants
Petroleum jelly or anti-chafing balms can be applied to your feet, especially on hotspots. This reduces friction and helps prevent blisters from forming. When using patches, applying a lubricant on top can make them more effective and reduce discomfort caused by friction.
Treating Blisters That Haven’t Popped
Even with the best prevention strategies, blisters can still occur. If one forms, it’s important to address it promptly to avoid further issues.
1. Don’t Pop Unnecessary Blisters
If your blister hasn’t popped, avoid puncturing it unless necessary. The skin covering the blister serves as a natural barrier to infection. Only lance a blister if you’re worried it might burst on its own and expose the raw skin to bacteria. If you do pop a blister, make sure to clean it properly to avoid infection.
2. Use Molefoam for Small Blisters
Instead of popping a small blister, protect it with a piece of Molefoam cut into a donut shape. This creates a cushion around the blister, preventing further irritation. You can also cover it with a Moleskin or Compeed patch to offer extra protection.
3. Lance Blisters That Are Likely to Pop
If a blister is large and at risk of bursting, carefully lance it with a sterilized scalpel or needle. Be sure to make a small incision at the edge of the blister to allow the fluid to drain out. Once drained, cover the area with a clean bandage or blister patch to protect it from infection.
Treating Open Blisters
If a blister has already popped, here’s how to treat it.
1. Trim Excess Skin Carefully
Only remove the flap of skin if it’s torn or dirty. If you need to trim it, do so carefully to avoid further damage to the area. Clean the raw skin underneath with an antiseptic wipe, and allow it to dry before covering it.
2. Cover the Blister
Apply antibiotic ointment to the exposed area, then cover it with a sterile bandage. For larger blisters, use a gauze pad and adhesive fabric tape. Moleskin or Compeed patches are great options too, as they provide a good cushion and stay in place.
3. Watch for Infection
Signs of infection in a blister include redness, warmth, swelling, and pus. If any of these symptoms appear, seek medical attention as soon as possible. Infections can lead to serious complications, so it’s important to take them seriously.
Blood Blisters: Special Care Needed
Blood blisters require extra care since they have a higher risk of infection. It’s best to let them heal naturally, but if they’re large, you can drain them carefully following the same procedure outlined above. If you have a health condition like diabetes, heart disease, or HIV, avoid draining blood blisters yourself and consult a healthcare professional.
Pack a Blister Kit
A small blister kit can be a lifesaver on the trail. Keep it lightweight by pre-cutting Moleskin patches and rolling adhesive tape around a cotton spool. Pack a few antiseptic wipes, gauze pads, and Molefoam donuts to cover any hotspots or blisters that might develop. A small ziplock bag can keep the kit organized and ready for use.
Get Back to Your Adventure
Blisters may be a hassle, but they don’t have to stop you from enjoying your hike or run. By taking preventive measures and knowing how to treat blisters properly, you can keep your feet in good condition and continue exploring the great outdoors.